


Grout Tools is the final step in completing any tile installation project. It fills the spaces between tiles, seals them, and gives your work a smooth, polished finish. Many homeowners underestimate the importance of grouting, but it plays a vital role in your tile surface’s look, longevity, and performance.
Whether you’re redoing a bathroom, installing a kitchen backsplash, or working on a tiled floor, using the right tools is key. Without the right tools, grout lines can become uneven, weak, or messy.
This article will walk you through every essential grout tool kit you need to get professional results.
Why Good Grouting Matters
Grout is more than just filler. It adds strength, stability, and visual appeal to a tile job. It prevents water from seeping underneath tiles and protects them from cracking and shifting. Well-applied grout also keeps dirt and debris from lodging between tiles.
But even the best grout won’t work well if the application is done poorly or with the wrong tools. You must use the proper techniques and tools to get that clean, firm finish.
Step-by-Step Tools You Need for Grouting Success
Each stage of the grouting process—preparation, application, and finishing—requires specific tools. Below, we break them down by function so you know exactly what to use and when.
1. Grout Float
This is the most essential tool for applying grout. A grout float is a flat, rubber-faced tool that spreads the grout across the tiles. You use it to push the grout into the spaces between tiles and then scrape off the excess.
Hold the float at a 45-degree angle. This helps press the grout deep into the gaps. Use the flat side to smooth it over the surface.
Tip: Choose a rubber grout float to avoid scratching your tiles.
2. Margin Trowel
A margin trowel is excellent for scooping grout from the bucket and placing it on the tile surface. It’s also helpful in getting grout into tight corners or edges where a float can’t reach.
This tool gives you better control, especially on smaller tile jobs or vertical applications like shower walls.
3. Grout Sponge
After the grout is applied, you’ll need a large, damp sponge to clean off the excess from the tiles. This step is crucial. Too much water can ruin the grout, and too little water won’t clean the surface well.
Rinse the sponge often and use a gentle circular motion to wipe the tiles. Be careful not to pull grout out of the joints.
4. Tile Spacers
Although tile spacers are mainly used during tile installation, they also play a role in grouting. They help ensure that grout joints are even in width.
This consistency makes it easier to apply grout and results in a clean, professional look.
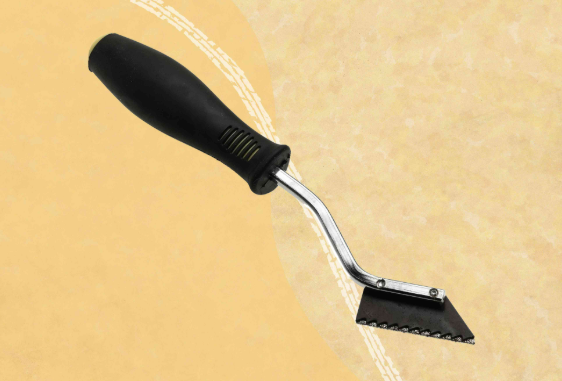
5. Grout Removal Tool
This tool is handy if you’re regrouting or fixing old tile jobs. It’s designed to scrape out old grout without damaging the tiles. Some models are manual, while others are electric.
Clearing out the old grout gives you a clean base to apply fresh material.
6. Grout Sealer Applicator
Once the grout is dry, sealing is essential. A grout sealer applicator helps apply the sealant evenly across the grout lines, protecting your work from water, mold, and stains.
You can use a brush or a roller applicator for this task.
7. Bucket and Mixing Paddle
You’ll need a clean bucket and a mixing paddle to prepare your grout. The paddle attaches to a drill and mixes the grout to the correct consistency.
Proper mixing ensures the grout bonds well and prevents cracks over time.
8. Grout Bag
Think of this like a piping bag used in baking. A grout bag lets you squeeze grout directly into the joints, which is helpful for small or detailed areas and uneven stone tiles or backsplashes.
9. Microfiber Cloth
After the grout has dried, a microfiber cloth is excellent for wiping off any remaining haze from the tile surface. This gives your tiles a beautiful shine without affecting the grout lines.
Pro Tips for Grouting Like a Professional
- Mix only as much grout as you can apply in 30 minutes.
- Always test a small area first to check for staining or tile damage.
- Work in small sections to avoid grout drying on the surface.
- Use gloves to protect your hands from grout chemicals.
- Ventilate the area, especially when sealing.
Grouting Mistakes to Avoid
Even with the right tools, mistakes can happen. Here are the most common ones:
- Using too much water during cleanup. This can weaken grout lines.
- Applying grout over dirty or dusty joints. Grout won’t bond properly.
- Not sealing grout. This leads to staining and water damage over time.
- Waiting too long to clean off grout haze. It can harden and be difficult to remove.
Maintaining Your Grouting Tools
Good tools can last a long time if you take care of them. Here’s how:
- Wash all tools immediately after use.
- Let them dry completely before storing.
- Keep tools in a toolbox or sealed container to avoid rust or dirt buildup.
- Replace worn-out sponges and damaged floats before your next project.
Conclusion
Grouting is the final touch that makes a tile job shine. It’s not just about filling the gaps—it’s about finishing the job with precision and strength. Whether you’re a first-time DIYer or an experienced tiler, having the right grout tools ensures your tiles look great and stay in place for years.
Every tool has a role, from the grout float to the microfiber cloth. You’ll get clean lines, strong joints, and a polished look every time by understanding how and when to use each one. Don’t rush it. Take your time, use the correct tools, and you’ll master the art of grouting in no time.
FAQs
What is the best tool for applying grout?
A rubber grout float is the best tool for applying grout. It helps you press the grout into the joints evenly and remove excess from the surface.
Can I reuse grout tools?
Yes. Most grout tools can be reused if appropriately cleaned right after use. Sponges and floats wear out over time, so inspect them before each job.
How long should I wait before sealing the grout?
Wait 48 to 72 hours after grouting before applying a sealer. This gives the grout enough time to cure properly.
Do I need different tools for floor and wall tiles?
Not necessarily. Most tools work for both, but grout bags and margin trowels are better for vertical surfaces or tight corners.
How can I remove grout haze from tiles?
Use a damp sponge during application, followed by a microfiber cloth once dry. A commercial grout haze remover can help remove stubborn haze.